Flowers
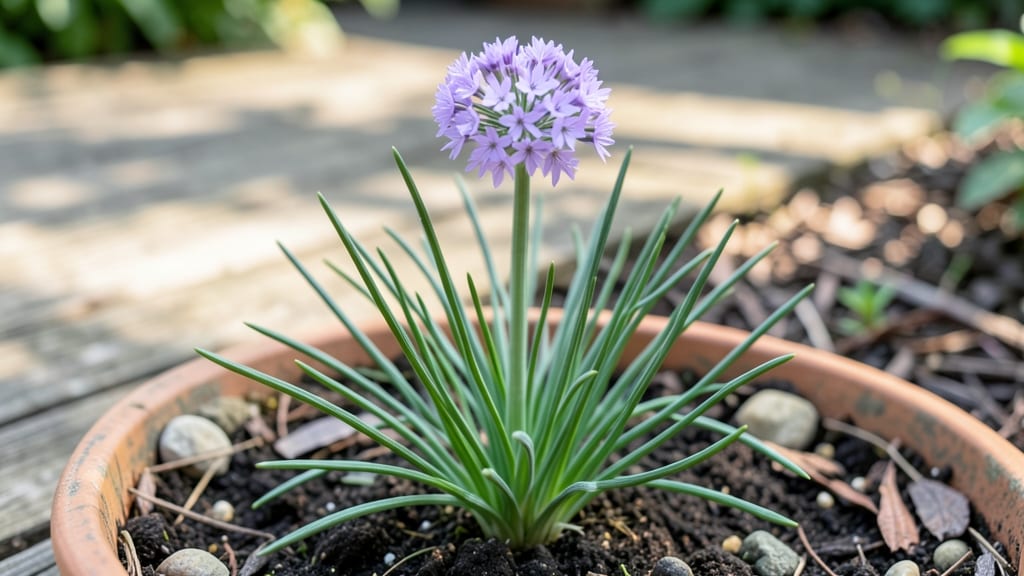
Chives do have flowers, and those delicate purple spikes are not just pretty—they’re edible and packed with flavor too.
If you’ve ever wondered whether those delicate purple spikes sprouting from your chives are just decorative—or something you can actually eat—you’re in the right place.
Chives aren’t just a kitchen staple; their edible flowers add a mild onion flavor and a stunning garnish to dishes, but only if you know when, how, and why to harvest them.
These blooms appear in late spring to early summer, turning your herb garden into a pollinator magnet while giving you a free, flavorful garnish. Whether you’re a beginner gardener or a seasoned chef, understanding when and how to harvest these flowers can elevate your cooking—and your garden’s productivity.
Below, I’ll break down everything you need to know: from identifying the blooms to harvesting them without harming your plant, plus creative ways to use them in your favorite recipes.
Do chives have flowers? Identifying edible blooms and their growth cycle
Yes, chives do have flowers, and they’re not just pretty—they’re edible too! Those purple-pink flower spikes that appear in late spring or early summer are a harvestable part of the plant.
The blooms taste like a milder, sweeter version of the stems, making them perfect for garnishes or flavorful additions to salads and soups. But timing and technique matter to keep your chives thriving.
The flowering process in chives is tied to their perennial life cycle. After the plant establishes in its first year, it focuses on leaf growth. By year two or three, you’ll see those familiar umbel-shaped flower clusters rising above the foliage.
Each flower stalk can reach 6–12 inches tall, depending on your chive variety and growing conditions.
| Stage | Key Features | Timeframe | Action |
|---|---|---|---|
| Establishment | Leaves grow 4–6" tall, no flowers | Year 1 (Spring–Fall) | Harvest leaves as needed |
| Flower Buds | Purple buds form at stem tips | Late Spring (May–June) | Leave buds to bloom for pollinators |
| Full Bloom | Open purple-pink flowers, 6–12" tall | Summer (June–August) | Harvest flowers or let seeds form |
| Seed Production | Brown seed heads replace flowers | Late Summer–Fall | Remove seed heads to encourage regrowth |
| Dormancy | Leaves die back in frost | Fall–Winter (Zones 6a and below) | Mulch to protect roots |
The timing of chive flowers depends on your climate zone and growing conditions. In warmer zones (7–10), chives may bloom as early as April, while in cooler zones (3–6), flowering typically starts in May or June.
If your chives aren’t flowering, check their sunlight exposure—they need at least 4–6 hours of sun daily to trigger blooming.
One common misidentification is confusing chive flowers with wild onions or garlic chives. True chives (Allium schoenoprasum) have hollow stems and purple-pink flowers, while garlic chives (Allium tuberosum) have white or lavender flowers and a stronger garlic flavor.
Always double-check before harvesting to avoid accidentally pulling weeds!
To encourage more flowers, reduce nitrogen-rich fertilizer in early summer, as too much promotes leafy growth over blooms. Instead, use a balanced 5-10-10 fertilizer or compost tea to support flowering. Deadheading spent blooms can also prolong the flowering season and prevent self-seeding, which can lead to overcrowding.
Harvesting chive flowers at the right time is key. Pick them when fully open but before seeds form—this ensures the best flavor and encourages the plant to produce more blooms.
Use clean scissors or pruners to cut the flower stalks at the base, leaving at least 2–3 inches of leaf growth to keep the plant healthy. Avoid harvesting more than one-third of the plant at once.
Climate plays a huge role in chive flowering. In humid climates, chives may produce fewer flowers due to fungal risks, while dry, sunny conditions often yield abundant blooms. If you live in a rainy area, improve drainage and space plants 12 inches apart to reduce moisture-related stress.
Mulching with straw or pine needles also helps regulate soil temperature and moisture.
Did you know chive flowers are rich in antioxidants and contain vitamin K? They’re also a pollinator magnet, attracting bees and butterflies to your garden.
If you’re growing chives for both culinary and ecological benefits, consider planting them near vegetables that need pollinators, like tomatoes or peppers. Just be mindful not to over-harvest—balance is key!
If your chives stop flowering after a few years, it might be time to divide and replant them. Every 3–4 years, dig up clumps, separate the smaller shoots, and replant them in fresh soil.
This rejuvenates the plant and often boosts flower production in the following season. A little care goes a long way!
🌱
How to harvest chive flowers for cooking: step-by-step guide with culinary uses
Harvesting chive flowers is easier than you think, and it’s a game-changer for your cooking. These delicate purple blooms taste like a milder, sweeter version of the green stems—perfect for garnishing soups, salads, or even infusing oils.
The key is timing and technique to ensure your plant keeps producing both leaves and flowers season after season.
Unlike the green stems you might already harvest, chive flowers have a unique mild onion-garlic flavor with a hint of sweetness. They’re best picked when fully open but before they turn brown.
This ensures peak flavor and prevents the plant from going to seed too quickly, which can reduce leaf production.
Step-by-Step Guide to Harvesting Chive Flowers
-
Step 1: Wait for Full Bloom
Harvest flowers when fully open but before they turn brown. This is usually late spring to early summer, depending on your USDA zone. -
Step 2: Use Clean Scissors
Snip the flower stems with sharp scissors or pruners, leaving 1-2 inches of stem attached to the plant. This prevents damage to the root system. -
Step 3: Avoid Over-Harvesting
Never remove more than 1/3 of the flowers at once. This ensures the plant can regenerate leaves and produce more blooms next season. -
Step 4: Store Properly
Place harvested flowers in a paper towel-lined container and refrigerate for up to 3-5 days. For longer storage, freeze dried flowers in an airtight container. -
Step 5: Encourage Regrowth
After harvesting, water deeply and add a balanced fertilizer (like 5-10-10) to promote new leaf and flower growth.
One of the best parts about harvesting chive flowers is how versatile they are in the kitchen. While the green stems are great for chopping into dishes, the flowers add a visual pop and a subtle onion flavor.
Try them in salads, as a garnish for soups or eggs, or even infused in honey or vinegar for a unique twist.
If you’re growing chives for both leaves and flowers, aim to harvest flowers in small batches throughout the season. This way, you’ll enjoy a steady supply of both without sacrificing the plant’s productivity. Plus, the flowers attract pollinators, making your garden even more vibrant!
Pro tip: If your chives aren’t flowering, they might need more sunlight or well-draining soil. A little extra care can make all the difference in encouraging those edible purple spikes to appear year after year. 🌸