
How To
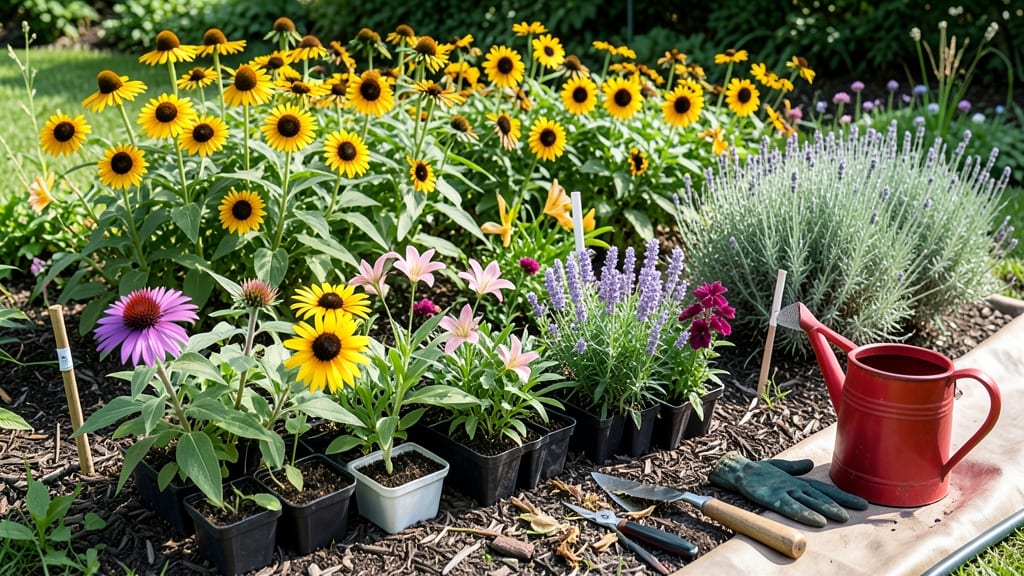
Making a flower bed is easier than you think—it’s all about layering the right plants for year-round color and texture, even if your yard is still a patch of dirt.
Picture this: a low-maintenance bed that bursts with blooms from spring through fall, with foliage holding it together when the flowers fade. The secret isn’t fancy tools or rare plants—it’s how you arrange them, from the tallest back to the shortest front, and which perennials and annuals play well together.
You’ll learn how to prep the soil in 3 simple steps, pick plants that thrive in your zone, and avoid the 5 biggest mistakes that turn pretty beds into weedy eyesores. No green thumb required—just a little planning and a willingness to get your hands dirty.
By the end, you’ll have a step-by-step roadmap to design a bed that looks like it belongs in a magazine, whether you’re starting from scratch or refreshing an old one. Let’s get growing!
Step-by-step guide to designing a layered flower bed for season-long beauty
Creating a layered flower bed isn’t just about planting pretty flowers—it’s about crafting a dynamic display that thrives all season. The key lies in strategic layering, where taller plants frame shorter ones, and blooms overlap to create continuous color.
Whether you’re a beginner or seasoned gardener, this method ensures your bed stays lush from spring through frost.
Before grabbing your shovel, gather essential tools: a garden spade, pruning shears, gloves, and a measuring tape. You’ll also need compost, mulch, and a variety of plants—think perennials for structure, annuals for color bursts, and foliage plants for texture.
Let’s turn that blank space into a showstopper.
🌱 Step-by-Step Guide to Layered Flower Bed Design
-
Step 1: Choose Your Location
Pick a spot with 6+ hours of sunlight (or partial shade for shade-loving plants). Ensure it’s near a water source and visible from your home or patio.
-
Step 2: Mark the Bed Shape
Use spray paint or stakes to outline your bed. Common shapes include rectangular, circular, or kidney-shaped—pick one that complements your space.
-
Step 3: Clear and Loosen Soil
Remove weeds, rocks, and grass. Loosen soil to a 12-inch depth with a spade or tiller. Add 2-3 inches of compost to enrich the soil.
-
Step 4: Plan Your Layers
Back Layer (Tallest): 3-6 ft (e.g., Dahlias, Coneflowers)
Middle Layer (Medium): 1-3 ft (e.g., Black-Eyed Susans, Daylilies)
Front Layer (Shortest): <1 ft (e.g., Pansies, Creeping Thyme) -
Step 5: Plant in Groups
Group 3-5 plants of the same type together for a natural look. Space plants based on their mature size (e.g., 12-18 inches apart for medium plants).
-
Step 6: Add Mulch
Spread 2-3 inches of mulch (e.g., shredded bark or straw) to retain moisture, suppress weeds, and regulate soil temperature.
-
Step 7: Water Deeply
Give your bed a deep watering after planting. Water in the morning to reduce evaporation and fungal risks.
-
Step 8: Maintain and Deadhead
Remove spent blooms regularly to encourage new flowers. Add seasonal plants (e.g., Mums in fall, Tulips in spring) to extend the bloom cycle.
Layering isn’t just about height—it’s also about color harmony. Pair cool blues and purples with warm oranges and yellows for contrast, or stick to a monochromatic palette for elegance. For example, purple Salvia pairs beautifully with yellow Coreopsis, while white Shasta Daisies brighten any bed.
Pro tip: Use odd-numbered groupings (e.g., 3, 5, or 7 plants) for a more natural, balanced look. Avoid symmetry unless you’re going for a formal garden style. Mix textures too—spiky Yucca contrasts with soft Lamb’s Ear, adding depth beyond just color.
Don’t forget to rotate plants seasonally to keep your bed dynamic. Swap out spring bulbs (Tulips, Daffodils) for summer annuals (Marigolds, Zinnias), then transition to fall mums and ornamental grasses. This ensures your flower bed remains a year-round star without requiring constant replanting.
For extra flair, add focal points like a sculpture, birdbath, or trellis to draw the eye. Place taller plants behind these features to create a visual anchor. And if you’re feeling adventurous, try a themed bed—think cottage garden, modern minimalist, or pollinator-friendly—to reflect your personal style.
Finally, document your progress! Take photos each season to track changes and celebrate your hard work. With these steps, your layered flower bed will become the jewel of your garden, blooming effortlessly from spring to frost.
Best flower combinations for year-round color: a seasonal planting plan
A year-round flower bed isn’t just possible—it’s easier than you think when you layer plants by seasonal bloom times and height zones. The key is mixing perennials (for structure) with annuals (for seasonal pops of color) and adding foliage plants to fill gaps.
This plan ensures your bed stays vibrant from early spring through late fall, even in partial shade.
Start with 3 height layers**: back (tall perennials), middle (medium annuals/perennials), and front (low-spreading plants). For example, pair black-eyed Susans (3-4 ft) at the back with salvia (2-3 ft) in the middle and ajuga (6-12 inches) at the front. This creates depth while keeping maintenance low—no dead zones!
Native plants are your best friends for low-maintenance color. They thrive in your climate, resist pests, and often attract pollinators. For instance, coneflowers bloom from summer to fall, while heuchera (coral bells) adds winter interest with its colorful foliage. Mix these with seasonal annuals like pansies (spring/fall) and zinnias (summer) for continuous blooms.
For color coordination, stick to a 3-color scheme per bed (e.g., purple + yellow + white) to avoid visual clutter. Use contrasting foliage, like silver lamb’s ear or burgundy heuchera, to tie seasons together.
For example, plant purple salvia with yellow black-eyed Susans and white ajuga for a cohesive look that pops all year.
Don’t forget mulch! A 2-3 inch layer of organic mulch (like shredded bark) suppresses weeds, retains moisture, and regulates soil temperature. Replenish it annually in early spring and after fall planting.
Pair this with drip irrigation for the back row to save time and water—your plants will thank you!
Pro tip: Plant bulbs in layers for early spring color. Start with tulips (6 inches deep), then daffodils (4 inches), and top with crocuses (2 inches). They’ll bloom in succession, giving you 6+ weeks of color before your perennials take over.
Add annuals like sweet alyssum around them for a soft, filler effect.