
How To
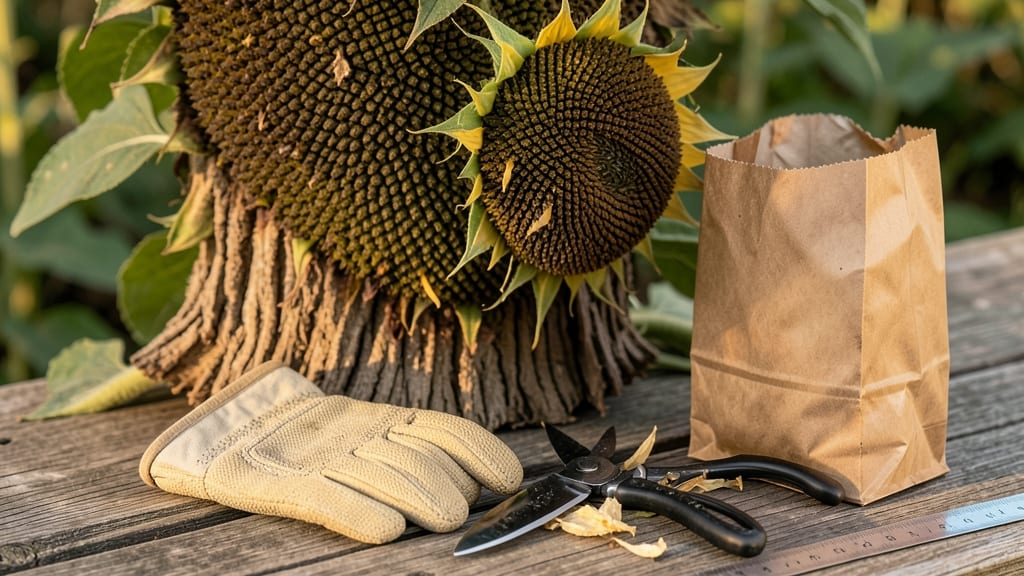
Picking sunflower seeds at the right time means the difference between rich, flavorful harvests and bitter, wasted effort — and the key is watching for a color shift in the seed head that most gardeners miss.
Sunflowers aren’t just beautiful—their seeds are packed with nutrients, but timing their harvest wrong means bitter, unripe seeds or wasted effort. The right moment to pick sunflower seeds hinges on one telltale detail: the color of the seed head.
If you’ve ever cut into a sunflower head too soon, only to find the seeds still green and underdeveloped, you know how frustrating it can be. Or worse, waited too long and had birds or pests ruin your harvest.
The good news? This simple color guide will help you nail the perfect timing every time.
Below, I’ll walk you through exactly what to look for—from the golden transition to the final brown stage—plus how to handle the seeds once they’re off the stalk to keep them fresh and viable for months.
How seed-head color changes signal perfect sunflower seed ripeness
The sunflower seed head undergoes dramatic color shifts that reveal its ripeness. Early in the season, the head stays bright green, signaling active growth. As maturity approaches, these shifts become your harvesting cues.
The first transformation happens when the outer petals turn brown and begin to dry, while the back of the head starts showing subtle golden hues. This is when you’ll want to start monitoring daily.
For standard varieties, the back of the seed head turns a dull golden-yellow when seeds are nearly ready. In dwarf varieties, this shift appears slightly earlier due to their shorter growing cycle.
The color intensity varies by variety—mammoth sunflowers may show deeper browns, while smaller types often display softer tans. Pay close attention to these differences to avoid missing your window.
Here’s the critical color progression you should watch for:
- Green (early growth)
- Green-to-gold transition (petals drying)
- Golden-yellow back (seeds ripening)
- Brown/dry head (fully mature)
| Stage | Seed Head Color | Back of Head | Seed Condition | Action |
|---|---|---|---|---|
| Early Growth | Bright green | Green | Soft, undeveloped | Wait |
| Petal Drying | Brown petals, green center | Green-to-gold | Firming up | Monitor daily |
| Nearly Ready | Dry brown petals | Golden-yellow | Plump, dark seeds | Check seeds |
| Fully Mature | Fully brown/dry | Brown | Hard, black-striped | Harvest immediately |
🌻 Pro Tip: Shake the head—if seeds rattle loudly, they’re ready!
The back-of-head test is your most reliable indicator. When the receptacle (the base where seeds attach) turns from green to dull brown, seeds are at peak ripeness.
For mammoth varieties, this area may stay slightly green longer due to their size, so check 3-5 days after petals drop. Dwarf varieties, however, ripen faster—watch for the back turning brown within 2-3 days of petal dryness.
One common mistake is harvesting too early because the head still looks partially green. If you cut stems when the back is only light yellow, seeds will be underdeveloped and bitter.
Always wait until the entire back is brown, even if petals have fallen off. This ensures maximum flavor and viability for storage or planting.
Environmental factors can delay color changes. Cool nights or high humidity may slow the drying process, keeping the back green longer. In these cases, use a magnifying glass to inspect the seed attachment points—they should appear dry and papery.
If you’re unsure, wait 24 hours and recheck. Patience here prevents wasted harvests.
For black oil sunflowers, the back turns a deep brown with a slightly papery texture. In contrast, Russian mammoths show a softer tan when ready. Variety-specific cues matter—always reference your seed packet for expected maturity times.
If your sunflowers are bolting early (common in hot climates), the color shift happens 2-3 weeks sooner than average.
Harvesting at the right color stage isn’t just about seed quality—it’s about preserving your plant’s energy. Once seeds mature, the sunflower redirects nutrients to the root system, weakening the stem.
Cutting too late risks toppling plants or attracting pests like squirrels. Aim to harvest within 3-5 days of the back turning fully brown for the best results.
Remember, the color shift is your sunflower’s way of signaling readiness. By mastering these visual cues—petal dryness, back color, and seed rattling—you’ll never miss the perfect moment to harvest. Now that you know what to look for, your seeds will be plump, flavorful, and ready for storage.
Step-by-step guide to harvesting sunflower seeds at peak freshness
Now that you’ve spotted the perfect color cues for ripeness, it’s time to harvest your sunflower seeds with precision. The goal is to remove them at the peak of freshness—when they’re fully mature but haven’t yet dried out on the plant or fallen victim to pests.
Start by selecting a dry, sunny day to minimize moisture and speed up the drying process.
Use a sharp pair of pruning shears or a clean knife to cut the seed head from the stem, leaving about 6-12 inches of stem attached. This extra stem acts as a natural handle for hanging, making the drying process much easier.
If you’re harvesting multiple heads, wear gloves to protect your hands from spiky seed husks and potential allergens.
- 1 Choose the right day: Harvest on a dry, sunny day with temperatures between 60-80°F to prevent mold and ensure even drying.
- 2 Cut stems carefully: Use clean shears to snip 6-12 inches of stem below the seed head. Avoid crushing the head during the process.
- 3 Dry indoors: Hang seed heads upside down in a well-ventilated, dry space (like a garage or shed) for 1-2 weeks until seeds rattle freely when shaken.
- 4 Remove seeds: Once dry, rub the seed head between your hands or use a fork to pry out seeds. Discard chaff and damaged seeds.
- 5 Store properly: Place seeds in paper bags or breathable containers and store in a cool, dark place (like a pantry) for up to 6 months.
After harvesting, the next critical step is drying the seeds correctly. Hanging the seed heads upside down in a dry, shaded area (like a porch or attic) allows air to circulate freely, preventing mold and ensuring even drying.
If your climate is particularly humid or rainy, consider using a dehumidifier or fan to speed up the process.
Once the seed heads are fully dry—typically 1-2 weeks later—you’ll hear the seeds rattle inside the head when shaken. This is your signal that they’re ready for removal. To extract the seeds, gently rub the dried head between your hands or use a fork to pry them out.
Discard any seeds that are discolored, shriveled, or damaged.
For long-term storage, transfer your clean, dry seeds into paper bags or breathable cloth sacks. Avoid plastic containers, as they trap moisture and can lead to mold or spoilage. Store the seeds in a cool, dark place (like a pantry or basement) where temperatures stay between 50-70°F.
When stored properly, sunflower seeds can remain viable for up to 6 months, though germination rates may decline after 3-4 months.
If you notice premature drying (seeds falling out too soon) or signs of mold or pests, act quickly. For premature drying, harvest earlier and dry the seeds indoors with a fan or dehumidifier.
For mold, discard affected seeds immediately and store remaining seeds in a sealed container with silica gel packets to absorb excess moisture.